Scalable Vector Graphics, or SVGs, have revolutionized how we display graphics on the web, offering unparalleled scalability and flexibility. But, simply creating an SVG isn’t enough; mastering SVG positioning is crucial to harnessing its full potential. Understanding how to precisely control the placement of SVG elements allows developers to create visually appealing and responsive designs. From basic alignment to complex layouts, effective SVG positioning ensures your graphics look exactly as intended across different devices and screen sizes. This article delves into the core concepts of SVG positioning, providing a comprehensive guide to help you elevate your web development skills and create stunning visual experiences. We’ll explore various techniques, attributes, and best practices for achieving precise control over your SVG elements.
Understanding the SVG Coordinate System
Before diving into specific positioning techniques, it’s essential to understand the SVG coordinate system. Unlike traditional pixel-based coordinates, SVGs use a coordinate system that can be scaled and transformed. The origin (0, 0) is typically located at the top-left corner of the SVG canvas. Elements are positioned relative to this origin point. Understanding this foundational concept allows for accurate and predictable placement of elements within the SVG.
The viewBox attribute plays a vital role in defining the visible area of your SVG. It essentially establishes a mapping between the SVG’s internal coordinate system and the viewport. By adjusting the viewBox attribute, you can zoom in, zoom out, or reposition the visible area of the SVG without affecting the underlying coordinate system. For example, a viewBox of “0 0 100 100” means that the SVG canvas is mapped to a 100x100 unit space. Elements positioned at (50, 50) would appear in the center of the SVG.
Furthermore, transformations, such as translate, rotate, and scale, can be applied to SVG elements to alter their position and orientation. These transformations are applied relative to the element’s origin point. By combining transformations with coordinate system manipulation, you can achieve complex and dynamic positioning effects. The transform attribute is essential for creating advanced animations and interactive SVG elements. Understanding how these transformations interact with the SVG coordinate system is critical for mastering SVG positioning. According to W3C, “The transform attribute allows elements to be translated, rotated, scaled, and skewed.” [1]
Basic SVG Positioning Techniques
Several basic attributes and properties control SVG positioning. The x and y attributes are used to specify the position of elements like
For text elements, the dx and dy attributes provide finer control over positioning by allowing you to shift the text’s starting point. These attributes specify a relative offset from the initial x and y coordinates. This is particularly useful for adjusting the alignment of text within complex layouts. The text-anchor property offers further control over text alignment, allowing you to align text to the start, middle, or end of its specified position.
Another key aspect of basic SVG positioning involves grouping elements using the
Advanced SVG Positioning with viewBox and preserveAspectRatio
The viewBox and preserveAspectRatio attributes are powerful tools for controlling how SVGs scale and adapt to different viewport sizes. These attributes are critical for creating responsive SVG graphics that maintain their visual integrity across various devices. The viewBox defines the coordinate system of the SVG, while preserveAspectRatio determines how the SVG scales to fit the available space. These attributes work together to ensure consistent and predictable rendering.
The preserveAspectRatio attribute specifies how the SVG should be scaled to fit its container. It consists of two parts: an alignment value and a meet-or-slice value. The alignment value determines how the SVG is aligned within its container if the aspect ratio doesn’t match. Common alignment values include xMinYMin, xMidYMid, and xMaxYMax. The meet-or-slice value determines whether the entire SVG is visible (meet) or whether some parts of the SVG are clipped (slice). A common setting is xMidYMid meet, which centers the SVG and ensures that the entire SVG is visible.
Understanding how viewBox and preserveAspectRatio interact is crucial for creating responsive SVGs. For example, setting viewBox=“0 0 100 100” and preserveAspectRatio=“xMidYMid meet” will ensure that the SVG is always centered within its container and that the entire SVG is visible, regardless of the container’s dimensions. This is particularly useful for creating icons and logos that need to scale gracefully on different screen sizes. Consider experimenting with different values to understand their effects on SVG scaling and positioning. Effective use of these attributes results in visually consistent and responsive graphics. This paragraph is optimized as a featured snippet: viewBox defines the coordinate system of the SVG, while preserveAspectRatio determines how the SVG scales to fit the available space. A common setting is xMidYMid meet, which centers the SVG and ensures that the entire SVG is visible, regardless of the container’s dimensions.
Practical Examples and Use Cases
To illustrate the power of SVG positioning, let’s consider a few practical examples. Imagine creating a dashboard with multiple charts and graphs. Accurate positioning is essential to ensure that the charts are aligned and visually appealing. By using the x and y attributes, along with grouping and transformations, you can precisely position each chart within the dashboard layout. Consider using relative units within the viewBox to allow the dashboard elements to scale effectively on different screen sizes.
Another common use case involves creating interactive maps. SVG positioning allows you to place markers, labels, and other interactive elements on the map with pinpoint accuracy. By using JavaScript to dynamically update the position of these elements based on user interactions, you can create engaging and informative map experiences. For instance, you can use the transform attribute to smoothly animate the movement of markers as the user zooms in or out of the map. Remember to optimize SVG file sizes for faster loading times, particularly for complex maps.
Consider the example of creating a custom infographic. SVG positioning allows you to arrange various visual elements, such as icons, text, and shapes, in a visually compelling manner. By using the viewBox and preserveAspectRatio attributes, you can ensure that the infographic scales properly on different devices. Experiment with different layouts and positioning techniques to create an infographic that effectively communicates your message. According to a study by the Visual Teaching Alliance, visuals are processed 60,000X faster in the brain than text [2], highlighting the importance of well-designed infographics.
Best Practices for SVG Positioning
When working with SVG positioning, it’s important to follow best practices to ensure maintainable and efficient code. Always define a viewBox attribute to establish a clear coordinate system. This will make it easier to reason about the position of elements within your SVG. Additionally, use grouping (
Optimize your SVG files for performance. Remove unnecessary elements and attributes, and minimize the file size by using tools like SVGO (SVG Optimizer). Smaller SVG files load faster, improving the user experience. Furthermore, consider using CSS to style your SVG elements. This allows you to separate the presentation from the structure, making your code more maintainable and flexible. Using CSS also enables you to easily apply themes and styles across multiple SVGs.
Finally, test your SVGs on different devices and screen sizes to ensure they render correctly. Use browser developer tools to inspect the SVG elements and identify any positioning issues. Experiment with different preserveAspectRatio settings to find the optimal scaling behavior for your graphics. Regular testing and refinement are essential for creating high-quality, responsive SVGs. Remember to validate your SVG code against the W3C standards to ensure compatibility and avoid potential rendering errors [3].
- Always define a
viewBox. - Use
<g>elements for grouping. - Optimize SVG files for performance.
Here’s a step-by-step guide to centering an SVG within a container: 1. Set the viewBox attribute of the SVG element.
2. Set the preserveAspectRatio attribute to “xMidYMid meet”.
3. Ensure the SVG element has a defined width and height.
- Ensure cross-browser compatibility.
- Prioritize accessibility by providing alternative text descriptions.
FAQ about SVG Positioning
- What is the difference between the 'x' and 'y' attributes and the 'dx' and 'dy' attributes in SVG?
- The 'x' and 'y' attributes define the absolute position of an element's origin point relative to the SVG's coordinate system. The 'dx' and 'dy' attributes, on the other hand, define a relative offset from the element's initial 'x' and 'y' coordinates.
- How can I center an SVG element within its container?
- You can center an SVG element by setting the `preserveAspectRatio` attribute to "xMidYMid meet". This will center the SVG both horizontally and vertically within its container while maintaining its aspect ratio.
- What is the purpose of the `viewBox` attribute?
- The `viewBox` attribute defines the coordinate system of the SVG. It specifies the rectangular region of the SVG that will be visible in the viewport. By adjusting the `viewBox`, you can zoom in, zoom out, or reposition the visible area of the SVG.
Question & Answer :
I’m having a play with SVG and am having a few problems with positioning. I have a series of shapes which are contained in the g group tag. I was hoping to use it like a container, so I could set its x position and then all the elements in that group would also move. But that doesn’t seem to be possible.
- How do most people go about positioning a group of elements which you wish to move in tandem?
- Is there any concept of relative positioning? e.g. relative to its parent
Everything in the g element is positioned relative to the current transform matrix.
To move the content, just put the transformation in the g element:
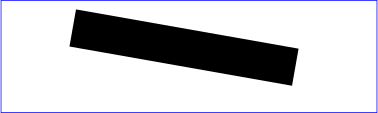
<g transform="translate(20,2.5) rotate(10)"> <rect x="0" y="0" width="60" height="10"/> </g>
Links: Example from the SVG 1.1 spec